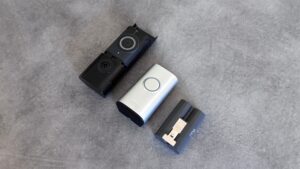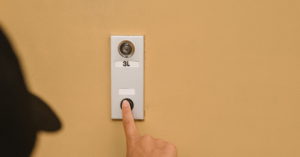
How to Remove Ring Doorbell: 5 Step-by-Step Guide


Key Takeaways
Removing a doorbell is usually straightforward, but knowing how to remove a Ring doorbell starts with preparing the workspace and identifying the power setup first.
- I gather the correct screwdriver, a container for small hardware, and a phone light if needed.
- I disable the device before touching the mount or wiring.
- I loosen the security screw and detach the doorbell without forcing it.
- I shut off circuit power before disconnecting a hardwired unit.
- I remove the device from the account before selling or giving it away.
What You Need Before Removing a Ring Doorbell

Before I begin, I determine if the unit runs off battery power or if it uses existing doorbell wiring. If the Ring Doorbell is hardwired, understanding how to wire a Ring Doorbell can also help me identify the wiring arrangement before I disconnect anything.
For normal removal, I have the security screwdriver or compatible screwdriver bit at hand, along with a regular screwdriver, a box for screws, and some tape for marking wires.
A flashlight comes in handy if the doorbell is placed under an overhang. Should I be uncertain about which circuit controls the doorbell, I pause to identify it prior to removing any wiring compartments.
Finally, I determine the purpose of removing the unit. If I am planning to relocate it, I take care to secure the camera and its mounting surface; if I am transferring it, I preserve any important data from the account. The five step uninstall guide serves as a good second reference point, but in practice, I use my hardware rather than try to fit everything into one mold.
Step 1: Disarm or Disable the Doorbell

Initially, I ensure that the Ring Doorbell is deactivated within the app before handling it. That way, there will be reduced chances of activating any alert while I handle the product. At the same time, I get an opportunity to verify whether the right device has been selected through my mobile device.
Within this particular account guide, the process of removing the device from the app involves deactivation and deletion.
Deactivation may allow the account owner to retain access to event history during the transfer of ownership while deletion eliminates the access to recorded events in the past; therefore, I download whatever I need to retain before selecting any of the options.
I do not yank the doorbell right away after making any changes to an app setting. Afterward, I give some time, ensure that the unit is no longer active, and then proceed to the fastener. In case the device does not belong to me but rather a shared one, I do not change any settings related to account ownership without the owner’s consent.
Step 2: Remove the Security Screw

The security screw normally rests on the bottom of the doorbell or faceplate section. I lay down a cloth or a tray underneath the security screw prior to unscrewing it since this is the part that I can lose very easily while working on the device. I apply some pressure on the screwdriver and turn it slowly without exerting force against the housing.
Sometimes a star-shaped T15 Torx security bit is used, although different tools may be found depending on the type of the device. I employ the bit that comes with the device and I stop when it starts to slip, which makes the process of unscrewing a lot harder.
The faceplate removal guide does not always coincide with the removal of the whole doorbell. In case the faceplate needs to be accessed, the faceplate removal guide will help me, but if the full doorbell needs to be removed, then I take out the screw and proceed with the next step.
Step 3: Remove the Ring Doorbell From Its Mount

Now that the security screw is loose, I grasp the body using both hands and identify the release gesture peculiar to the mount. Normally, I will be supporting the lower portion of the device and pulling it off gently from its mounting position, instead of trying to pull from the top or twisting the device in any way.
Should the unit resist removal, I will immediately stop and check whether there is a remaining securing mechanism at the bottom or side part of the doorbell. I will not be using prying actions near the camera lens, and I will make sure not to use any metal tool between the device and the wall. Should the unit resist removal, I will immediately stop and check whether there is a remaining securing mechanism at the bottom or side part of the doorbell.
I will not use prying actions near the camera lens, and I will make sure not to use any metal tool between the device and the wall. If I am relocating the doorbell rather than permanently removing it, reviewing how to install a smart doorbell can help me prepare for the next installation.
Having detached the body, I will carefully put it on a soft and dry surface, with the camera lens facing upwards. The hardwired unit could still be secured through two conductors; thus, I will not be letting the device hang on the wires. As an additional precaution, I will quickly take a picture of the installation area.
Step 4: Disconnect the Wiring if It Is Hardwired

For hard-wired installations, I shut down the power to the circuit in the electrical box prior to working on the terminals. If I need more information about the wiring itself, I can also review this guide on how to wire a doorbell before disconnecting the conductors. In case I cannot recognize or disconnect the circuit, I leave the cables untouched and seek help from an electrician.
I hold the device with one hand while unscrewing the terminal screws with another hand, making sure that each cable does not fall into the wall cavity. I mark the wires or make a picture of their connections before disconnecting them. Exposed cable ends must not come into contact with each other or with the mounting surface.
Below is a quick reference guide:
Once they have been disconnected, I will either cover or secure them as per the local electrical codes and leave them in the box. I never continue the removal process until the conductors are secured. The time that it takes is very little, and it ensures that the conductors are not the cause of the delay.
Step 5: Remove the Mounting Bracket

Once I have detached the doorbell from the wall, I need to take down the mounting bracket. The first thing I do is examine how the bracket was mounted, usually by screws and wall anchors, hold it steady while loosening the final fastener to prevent it from falling and stripping off the paint or plaster.
I collect all the screws and wall anchors and put them into one bag, even those that will not be reused. Next, I carefully remove the bracket and examine the wall for any traces of damaged paint or exposed holes.
If it is a temporary dismounting, I put all the screws and anchors into a bag with the label. For a permanent mounting, I fill the holes with the proper wall repair product once I clean out the dust. If there is any exterior hole, I check it for moisture before filling it up.
How to Remove a Battery-Powered Ring Doorbell
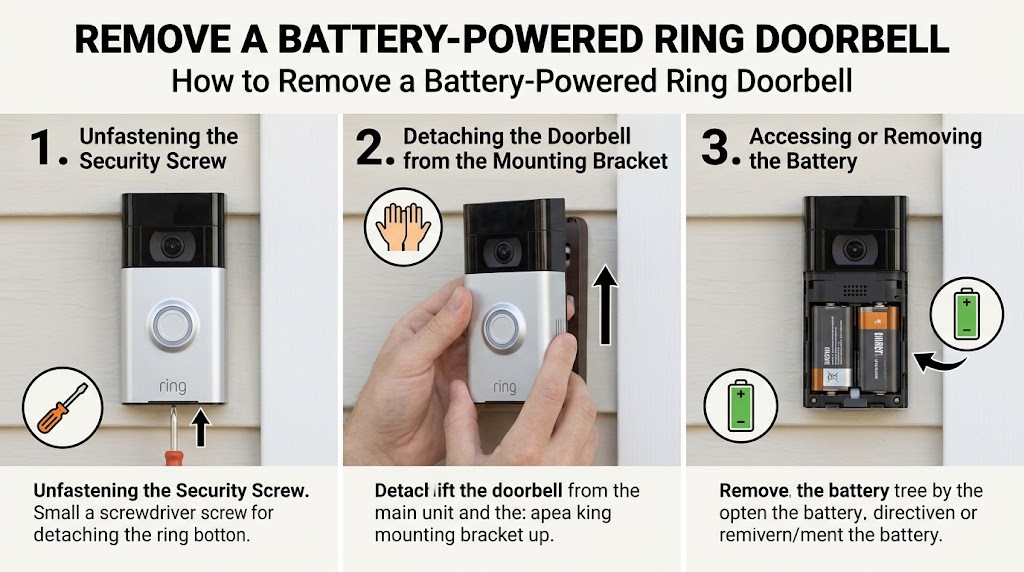
Unlike a hardwired version of a Ring Doorbell, there is no need for disconnection of the device from power supply, yet I will still shut it down prior to the removal of the security screw and body. Then, I will disconnect the device from the mounting using the battery-removal instructions for the specific model rather than prying apart its housing.
Some Ring Doorbells feature a detachable battery pack, while some models come with an integrated battery. For example, the Ring Battery Doorbell Plus uses battery power and has its own approach to battery access and maintenance, so I would follow the instructions for the specific model rather than assuming every Ring Doorbell is identical.
While accessing the battery compartment, I hold the device steady without trying to pull any ribbons or small connector from it. In case of battery removal, charging, or replacement, I will consult the charging instructions for the specific model.
This is particularly important because battery designs can differ between models such as the Ring Video Doorbell 4 and other Ring Doorbells. When the battery is disconnected or the whole device is unplugged from the mount, I put it aside in a dry place where there are no loose metal items nearby.
In case of returning the device to service, I will verify the battery charge and the condition of the mount before replacing it; otherwise, I will keep the hardware components assembled and finish the transfer of the account.
What to Do Before Selling or Giving Away a Ring Doorbell
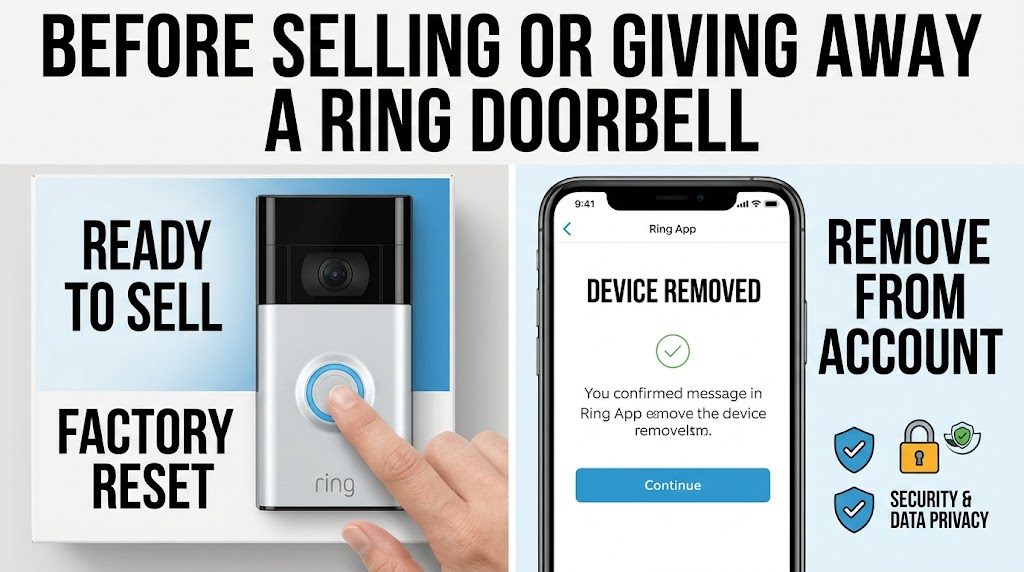
Physical removal alone doesn’t cut it either. Prior to selling or giving away the device, I consider if I need any recordings made during the time of the event history for that device and download them before proceeding.
Next, I verify if there’s any subscription tied to that device because removing the device from my account doesn’t automatically terminate any other subscription I might be paying for separately. If I am unsure about the ongoing costs, I can also check whether a Ring Doorbell requires a subscription before transferring the device.
With the account-owner controls at hand, I either deactivate or delete the device from my list based on the fact if I’m transferring the ownership of the device along with keeping myself accessible to the history or I just remove the device from my account access along with its recording history. In addition, I ensure that the device isn’t shown anymore under my list of active devices.
Lastly, I provide the proper security screw along with the mount and tool or the cable provided. I clean the outer surface and keep the lens covered and let the person know that they’ll have to connect the device themselves on their account.
Common Problems When Removing a Ring Doorbell
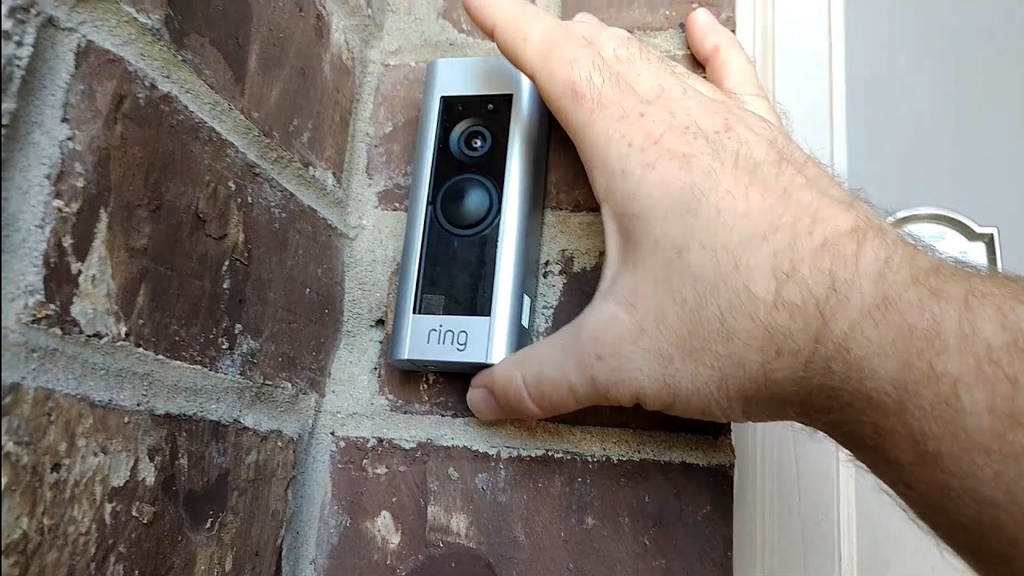
The most prevalent issue is a screw which will not turn. I first ensure that I have the right security bit and that it is inserted correctly.
Once the head starts stripping, I cease my efforts rather than continuously turning, since the process of replacing a small screw is less troublesome than fixing the stripped plastic or mount point.
Another common occurrence is a unit that is not coming off of the wall after removing the screw. I first check for a hidden release latch, the edge of the face plate, or a remaining fastener, then test the release direction with careful, consistent pressure. These are the troubleshooting steps I undertake prior to continuing:
- Ensure the security screw is fully removed.
- Look for a release tab or mount lip.
- Support the unit instead of pulling on the wires.
- Check for sealant or paint securing the edge of the bracket.
Should these troubleshooting steps fail, I stop and refer to the manufacturer’s instructions for that particular unit, or I seek the help of a professional. I don’t pry on the case, drill holes into the bracket, or cut wires just to save some time.
Conclusion
The safest way to remove a doorbell is to identify its power source, disable it, release the security hardware, disconnect wiring only after power is off, and clean up the account and wall afterward. Taking those steps slowly gives me a better chance of keeping the device, the hardware, and the mounting surface in good shape.
Frequently Asked Questions
Do I need to turn off power before removing a battery-powered doorbell?
No circuit shutdown is normally needed for a battery-powered unit, but I still disable the device and handle the battery according to its model instructions.
How can I tell whether a doorbell is hardwired?
Look for two conductors connected behind the device or entering a wall box. If you are uncertain, treat it as wired and avoid touching the connections until power is safely isolated.
What screwdriver removes the security screw?
Many doorbells use a security Torx bit, but the size and style can vary. The tool supplied with the device or the model’s instructions is the safest reference.
What should I do if the security screw is stripped?
Stop turning it and avoid pressing harder with an ill-fitting bit. A replacement bit or professional assistance may be needed to remove the fastener without damaging the housing.
Can I remove the mounting bracket without removing the doorbell body?
It is usually safer to detach the device first, because the body can obstruct the bracket screws and may place unnecessary strain on wiring.
Should I save recordings before giving the device away?
Yes. Save any recordings you want to keep before deactivating or deleting the device from your account, because account changes can affect access to event history.
What should I do with exposed wires after removal?
Keep the conductors separated and safely contained inside the electrical box. If you are not comfortable securing them or identifying the circuit, contact a qualified electrician.