My garage door remote went out of its best use the other day, and I’m pretty mad about that. I was in a hurry to leave, push the button, and nothing. Just silence.
Before I considered calling in a repair person or purchasing a brand new whole garage door remote, I recalled that the most prevalent problem is quite simply a dead garage door remote battery.
It is a very easy thing to fix; I can fix it myself in a few minutes. If you’re having a similar issue, I’m going to show you how to determine if the issue is due to the battery, what type to purchase, and how to replace it.
Key Takeaways
- A dim or non-existent indicator light on your remote is a strong sign the garage door remote battery is dead.
- Reduced range or needing to press the button multiple times to get a response also points to a dying battery.
- Most garage door remotes use common coin cell batteries like the CR2032 or cylindrical batteries like the 27A 12V.
- Replacing the garage door remote battery typically involves sliding or unscrewing a cover, swapping the old battery for a new one with correct polarity, and reassembling.
- If the remote still doesn’t work after a battery change, check for engaged lock buttons on your wall unit, clean battery contacts, or consider reprogramming the remote.
Signs Your Garage Door Remote Battery Is Dead or Dying
Sure, anyone who has ever rushed through getting ready and pressed their garage opener remote only to discover it was not working knows what I am talking about.
It can really be frustrating and although some of you might immediately consider a hefty garage repair cost, the problem may be simpler than you expect – your garage remote opener needs a new battery!
There are a number of symptoms which point towards this issue and I will tell you about one of the easiest to spot.
Have you noticed how the range at which you can activate the door has been reduced? You used to get in your car, drive down your driveway, park several feet away, press a button and voila, the door opens. Not anymore!
I also notice that I have to click the button more than once or for an extended period before anything happens. Before, one click was all it took for the garage door to begin moving. However, now I find myself clicking it like there’s no tomorrow.
When you notice that your remote seems to be doing whatever it feels like, responding at times but ignoring you at others, then you know that your battery is nearing the end of its life.
- Reduced Range: It requires you to be very close to the door to operate it from the remote.
- Multiple Presses Needed: You will have to press the button repeatedly to activate it.
- Inconsistent Operation: The remote operates occasionally but fails to do so at other times.
- Dim or No Indicator Light: If your remote has an indicator light that lights up on pressing, then if it is either dim or not lighting up, there is a problem with the batteries.
Sometimes, before you even get to the remote, it’s worth a quick check of your garage’s wall-mounted control panel. Make sure a “lock” or “vacation” mode hasn’t been accidentally activated, as this can disable your remotes. It’s a simple thing, but it’s saved me a headache or two.
If any of these signs appear, then you know for sure that a new battery will be needed. The good news is that replacing the battery is not difficult, and you do not need to have any technical skills to do so. In fact, you can easily purchase batteries in most stores.
What Battery Does a Garage Door Remote Use?
Choosing the right battery for the garage door remote will not be difficult. However, you will be faced with the problem when you realize that the remote does not work when you want it most.
In most cases, you will have a small, coin-sized battery that will do the job. In my case, I usually see the CR2032 battery which provides power at 3 volts.
The good thing about this battery is that it is used by many companies and even modern manufacturers. For example, if you have a LiftMaster remote, then it surely uses CR2032.
However, there are exceptions, especially among large models of remote controls; in this case, it uses A23 batteries providing 12 volts.
Here’s a quick rundown of common battery types you might encounter:
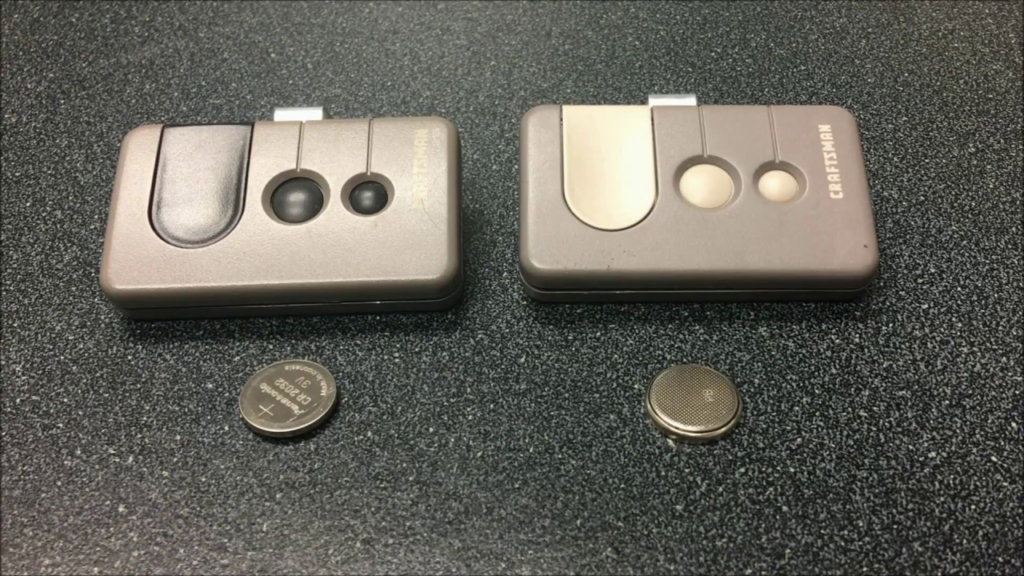
- CR2032: This is a 3V coin cell, super common in many remotes. It’s a reliable choice for most modern garage door systems.
- A23 (or MN21, L1028): These are 12V cylindrical batteries. You might find these in some older or larger remotes, sometimes those with blue buttons on Garador/Hormann models.
- 27A: Another 12V cylindrical battery, similar to the A23 but slightly different. Make sure you grab the right one.
The easiest way to know for sure is to just look at the old battery. The type and size are usually printed right on its surface. If you can’t read it or are unsure, taking the old battery with you to the store is a foolproof method. You can also check your remote’s manual if you still have it.
For your new purchases, I would advise purchasing two units. This is because one battery may be used on the keypad unit, and by keeping some extra units at hand, you will not run into a shortage of battery supply when the need arises next time.
On the other hand, OEM batteries, such as the CR2032, guarantee stable power supply across the board.
How to Replace a Garage Door Remote Battery Step by Step
Yes, it’s your garage door remote and you know for sure that the issue stems from the batteries within the device.
Don’t panic since this is one of the most common problems that are easily solved by any person who knows their way around garage doors. Trust me, you’ll have quite a lot of satisfaction once you manage to solve this problem.
Tools You Will Need
Most of the time, you won’t need much. Seriously, it’s usually just your hands, maybe a tiny screwdriver if your remote has a screw holding it shut, or sometimes a flathead screwdriver or even a butter knife can help you gently pry it open. It really depends on the specific remote model you have.
Step 1 – Locate and Open the Battery Compartment
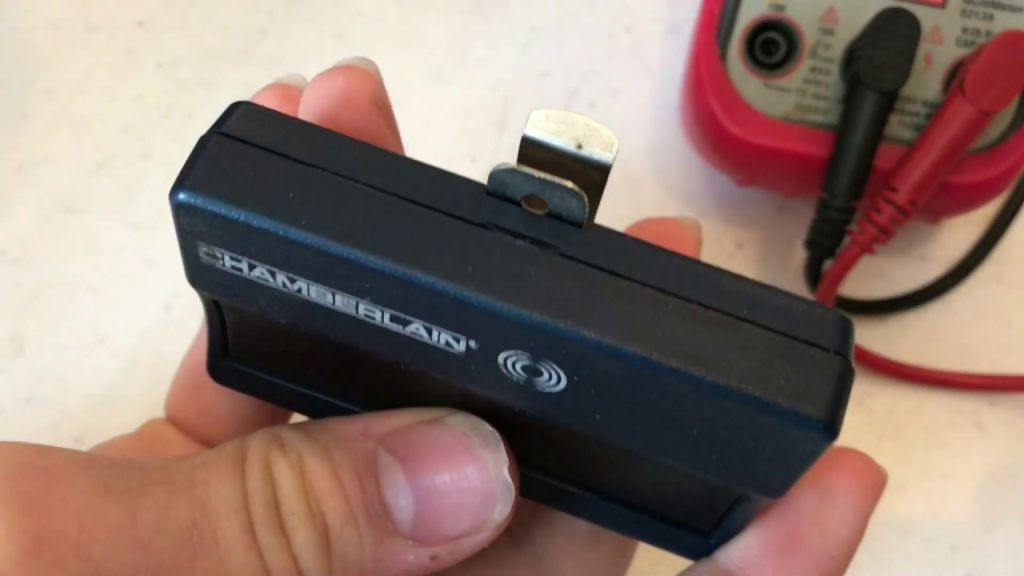
Let’s start by turning the remote over. You can look for a seam at the outer edges. If your remote has a small screw that needs to be taken off, this is where you find it.
But if there isn’t any screw, then it means that you will have to remove a cover, or carefully prise open the two sides from one another using a notch specifically provided for this purpose.
Step 2 – Remove the Old Battery Safely
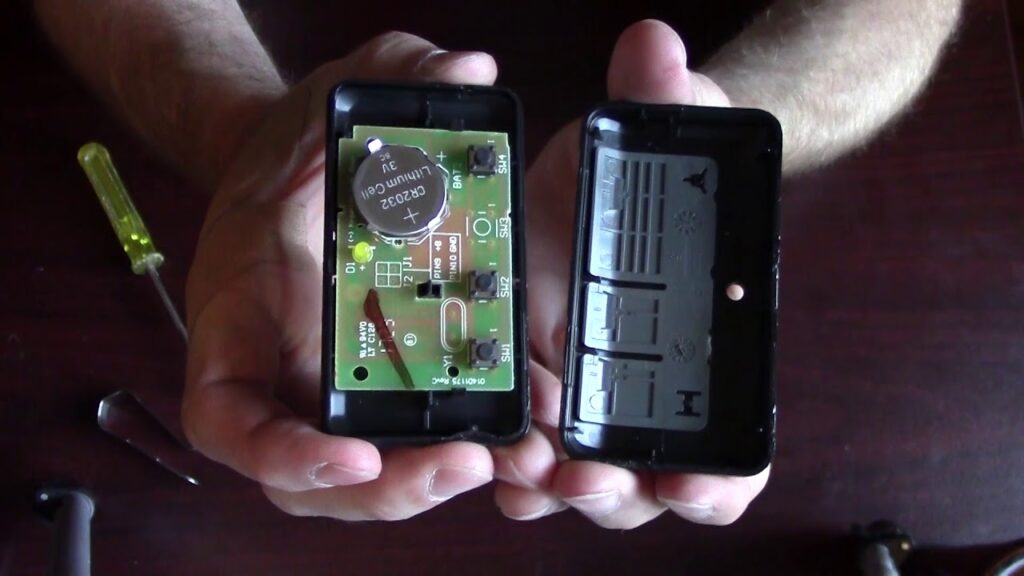
After opening it up, what you will see inside is the battery. This battery can be described as being a tiny coin-type battery, although it may come in other shapes.
You need to observe how this battery is oriented because there are + and – signs on its surface. Remembering this is crucial in making sure you can replace it correctly. You just have to remove the battery; if it won’t budge, a tiny tool or even your fingernail can do the job.
Step 3 – Check the Battery Contacts for Corrosion
While the compartment is open, check out the metal parts where the battery fits. Occasionally, there may be some whitish or greenish buildup there, which would be corrosion.
You can remove the build-up by using a simple pencil eraser or a small amount of rubbing alcohol applied to a cotton swab. Make sure it is dry before inserting the new battery.
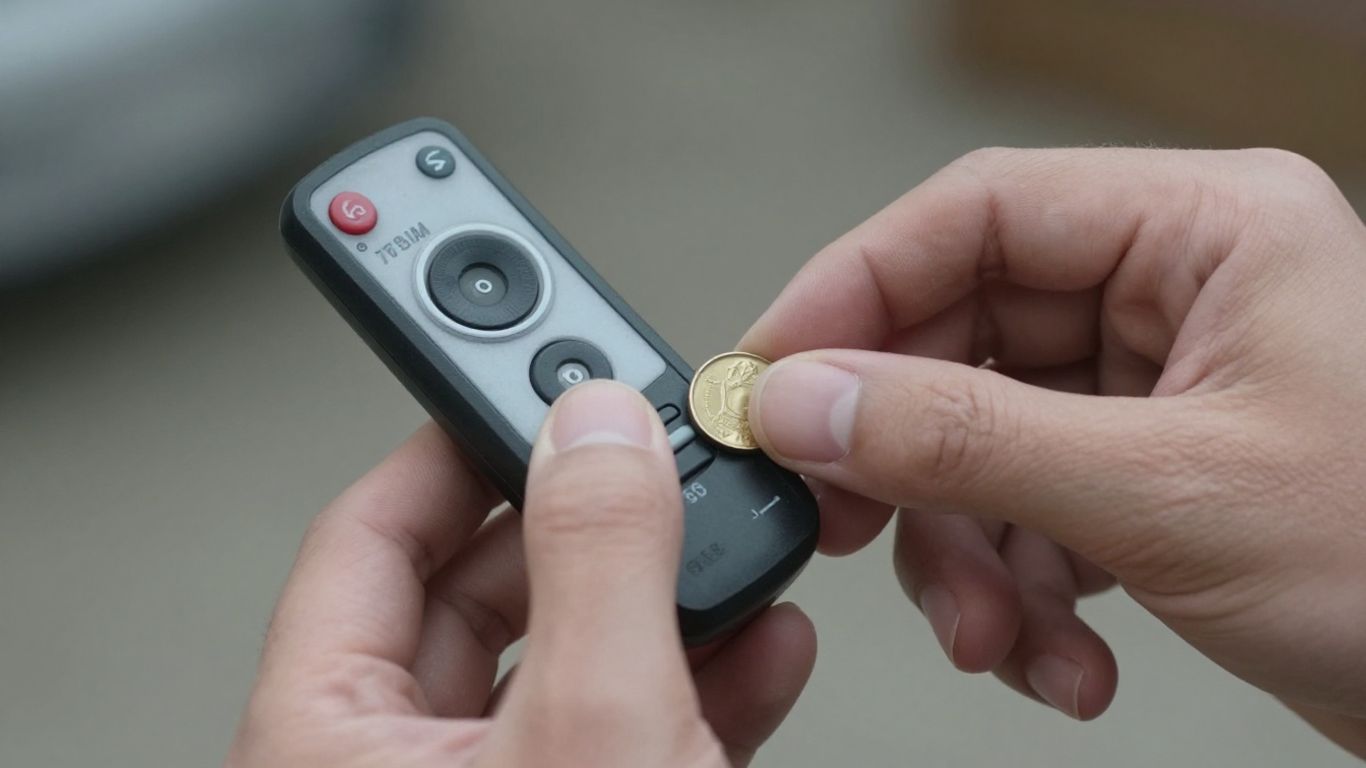
Step 4 – Insert the New Battery With Correct Polarity
Now, grab your new battery. Remember how the old one was facing? Put the new one in the exact same way. If you put it in backward, it just won’t work, and you might even damage the remote. Gently push it into place. It should sit snugly.
Step 5 – Close the Compartment and Test the Remote
Make sure that the remote is properly reassembled. If there was a screw that you unscrewed from the remote control, make sure that you screw it back in, although be careful not to tighten it too much.
Press the button on the remote and check whether there is a light and whether it works. Take it outside and open the garage door.
Sometimes, the simplest fixes are the most satisfying. Replacing a dead battery in your garage door remote is a prime example of a quick DIY win that saves you time and hassle. Just remember to pay attention to the battery’s orientation before you remove the old one.
Step 6 – Reprogram the Remote if It Still Does Not Work
In case your remote is not found after going through the above-mentioned options, then do not worry, as it may require synchronization with your garage door opener.
In order to synchronize your remote with your garage door opener, you have to look for a button called “learn” or “program” that may be present somewhere on your garage door opener motor unit near the antenna wire.
Normally, you will press and hold the learn button for a few seconds and press the button on your remote control, but the process might differ according to brand and make.
How to Replace a Garage Door Keypad Battery
All right, your garage door keypad is malfunctioning; you are sure the culprit is the battery. It’s very likely, actually. Your keypad gets quite a workout, and as with most electronic devices, the time will come for a change. Fortunately, changing the battery in your garage door keypad is not an overly complicated task, and I can guide you through it.
The first step would be to determine which type of battery your keypad uses, as there may be a slight difference between different keypads.
Your keypad requires a 9V battery or two or three AA batteries. You will be able to find this information on the keypad itself – most often on its backside, or in its manual if you still have it. It might be useful to take a photo of the keypad battery compartment while disassembling it.
Here’s a general rundown of how I usually tackle this:
- Locate the Battery Compartment: Most keypads have a cover that slides off or a small panel that pops open. Sometimes it’s on the back, and other times it might be hidden under the main casing. You might need a small screwdriver for this, but often, you can just use your fingernail or a flat object to gently pry it open.
- Remove the Old Battery: Once you’ve got the compartment open, carefully take out the old battery. Make sure you note which way the terminals are facing – this is super important for putting the new one in correctly.
- Insert the New Battery: Pop in your new battery, making sure the positive (+) and negative (-) ends are aligned just like the old one was. If it’s a 9V, the smaller terminal usually goes on top. For AAs, it’s usually the flat end that goes towards the spring.
- Test It Out: Before you snap everything back together, give the keypad a quick test. Press a few buttons. If the lights come on and it seems responsive, you’re probably good to go.
- Close It Up: Secure the battery compartment cover or panel. If there were screws, put them back in, but don’t crank down too hard – you don’t want to strip the plastic.
Sometimes, after changing the battery, the keypad might need to be re-synced with your garage door opener. This is usually a straightforward process involving pressing a ‘learn’ button on the opener itself. Check your opener’s manual if the keypad doesn’t work right away.
If your keypad still isn’t working after changing the battery, don’t panic. There could be other issues at play, like a problem with the opener itself or a connection issue. You can often find detailed instructions for your specific model by searching online for the keypad’s model number.
Remember, most garage door keypads use batteries that don’t last forever. It’s a good idea to keep a spare battery on hand, especially if you notice the keypad’s response time slowing down or the indicator light getting dim. This way, you’re ready for the next time it happens.
Garage Door Remote Still Not Working After Battery Replacement?
So, I swapped out the battery in my garage door remote, feeling pretty good about myself, and then… nothing. The door just sat there, stubbornly closed. It’s a frustrating moment, I know. You think you’ve solved the problem, only to find out it’s something else.
First things first, double-check that new battery. Did I put it in the right way? Sometimes, in my haste, I’ve put them in backward, and that’s a surefire way to get zero response.
Also, make sure the battery contacts inside the remote are clean. A little bit of grime or corrosion can stop a fresh battery from making a good connection. I usually grab a cotton swab and a tiny bit of rubbing alcohol for this – just be sure to let it dry completely before trying again.
If the battery seems fine and the contacts are clean, the next big thing to check is the connection between your remote and the opener unit itself.
It’s possible that changing the battery, or even a brief power flicker, has caused the remote and opener to lose their sync. This is pretty common, actually. Most garage door openers have a “learn” button on the motor unit, usually near the antenna.
You’ll typically press that button, wait for a light to blink, and then press the button on your remote within about 30 seconds. It sounds complicated, but it’s usually a quick process. If you’re unsure, looking up the specific instructions for your opener model online is a good idea.
Sometimes, the simplest solutions are the ones we overlook. Before assuming a major malfunction, take a moment to re-verify the basics: correct battery installation, clean contacts, and a proper re-sync with the opener unit. These steps resolve a surprising number of issues.
Another thing to look at is the antenna on your opener unit. That little wire hanging down? It’s important. Make sure it’s not damaged, coiled up tightly, or touching any metal. A bent or obstructed antenna can really mess with the signal.
I’ve also found that sometimes the safety sensors at the bottom of the garage door tracks can get bumped out of alignment or get dusty. If those aren’t lined up right, the whole system might refuse to respond to the remote as a safety measure. It’s worth giving them a quick check and wipe-down.
If none of that works, I’d take a good look at the remote itself. Did it take a tumble recently? Did it get wet? Sometimes, internal damage from a drop or moisture can be the real culprit, and a new battery won’t fix that. If you’ve tried all these steps and it’s still a no-go, it might be time to consider getting a new remote or calling a professional.
Is your garage door remote acting up even after you swapped out the battery? Don’t let a finicky remote keep you from your garage. There could be other simple fixes you haven’t tried yet. For more troubleshooting tips and solutions, visit our website today!
Wrapping It Up
So, there you have it. Replacing the battery in my garage door remote wasn’t nearly as bad as I thought it would be. Honestly, I was dreading it, picturing myself fumbling with tiny screws and ending up with a remote that was more broken than before.
But it was pretty straightforward. I just needed to find the right little coin battery, pop out the old one, and slide in the new.
And the best part? It actually worked! My garage door opens from a normal distance again, no more standing right in front of it like a weirdo. If yours is acting up, give it a shot. It’s a small fix that makes a big difference in my day-to-day.
Frequently Asked Questions
How often do I need to swap out my garage door remote battery?
Generally, the battery in my garage door remote should last about two years with normal use. However, this can change depending on how often I use my garage and if I live in a place with really hot or cold weather. If I notice my remote acting sluggish, I might need to change it sooner.
What kind of battery does my garage door remote take?
Most garage door remotes use small, coin-shaped batteries, often a CR2032. Some might use a small cylindrical battery, like a 27A or 23A. The best way for me to know for sure is to look at the old battery; the type is usually printed on its side. If I’m unsure, I can take the old battery with me to the store.
My remote still doesn’t work after changing the battery. What else could be wrong?
Even with a new battery, my remote might not work if the battery contacts inside are dirty. I can try cleaning them gently with a cotton swab dipped in rubbing alcohol. Also, I should check if the ‘lock’ or ‘vacation’ mode is accidentally turned on my wall control unit. Sometimes, the remote might need to be re-paired with the opener.
Do I need to reprogram my remote after changing the battery?
In most cases, I don’t need to reprogram my remote after just changing the battery. The remote usually keeps its memory. But, if it stops working, I might need to press the ‘learn’ or ‘program’ button on my garage door opener unit to reconnect it. My opener’s manual will have the specific steps for this.
What are the signs that my garage door remote battery is dying?
I’ll know my garage door remote battery is getting weak if the range shrinks – meaning I have to be closer to the door for it to work. I might also find myself pressing the button multiple times, or the indicator light on the remote might be dim or not light up at all. Sometimes, it just works when it feels like it.
Can I use my smartphone as a garage door remote?
Yes, some newer garage door openers have smart features that let me use my smartphone as a remote. This usually involves connecting the opener to my home Wi-Fi network and using a special app. It’s a handy alternative if my physical remote is giving me trouble.
Ready to Choose the Right Smart Doorbell?
Now that you know how to install a smart doorbell, the real question is — which one is actually worth your money? Don’t guess. We’ve tested the top options so you can pick the best one for your setup.
👉 Pro tip: If you want zero monthly fees, start with Eufy. If you prefer Alexa integration, Ring might suit you better.